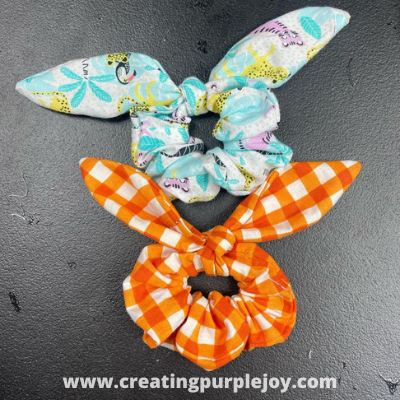
Scrunchies have officially made their comeback! I remember wearing them like crazy in the 90s! They are just sooo cute! One of my favorite scrunchies is the Bow Knot Scrunchie! You can wear it a few different ways: with the bow, without the bow or you can use the bow to wrap around an elastic and put it on your hair!
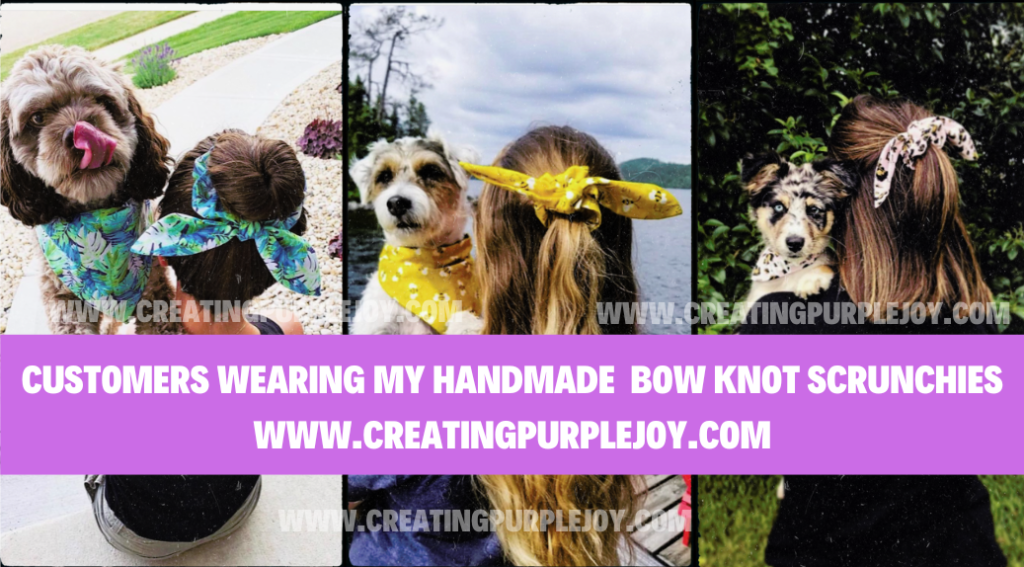
I have been making bow scrunchies for a few years for my handmade shop, Little Shop Joy. They are my customer’s favorite way to match with their fur babies. You can easily create a few Knot Bow Scrunchies in minutes
What do you need to make a Bow Knot Scrunchie?
4.5in x 20 inche Fabric
My Knot Bow Scrunchie Pattern piece
1/4 inch elastic – 7 inches long
How to make a Bow Knot Scrunchie?
I created this YouTube Video to show you how I create mine – in case you are a visual learner! You can watch or skip below to the instructions 🙂
DIY Bow Knot Scrunchie Instructions
Scrunchie Instructions:
- After you have cut your fabric and elastic, fold the long piece for the scrunchie in half and sew along the edges. Seaming allowance 1/4.
- Turn the Scrunchie Part right side out and use a bobby pin to insert the elastic. Sew both pieces of elastic together.
- Tuck the sides of the scrunchie inside and sew one more line to complete the scrunchie.
- Place both pieces of the knot bow fabric together. The right sides should be facing together. Sew along the edges and leave an opening so you can turn it right side out.
- Turn it right side out and tuck the raw edges in at the opening and then sew the opening close. Tie the Knot Bow over your scrunchie and that’s it! You can iron the Knot Scrunchie to make it lay and look better.
That’s it! You can also use different kind of fabrics to make your scrunchies! If you get stuck, send me an email or comment on my Youtube Video!
Happy Sewing,
Jackie
Follow along